WordPress Theme development process – Beginner, Part 2 (Local Development)
Local development server
 I have tried various ways of creating a local development environment for me to test my website ideas, most of which seemed highly technical and took me days of research. I don’t have the time to learn all the aspects of setting up a server, and I am always looking for new ideas. You can use the free software called VirtualBox from Oracle and create a virtual machine running any version of Linux and there are even preconfigured virtual appliances that you can download for use. I found using the virtual machines mostly easy to understand and use and was my main process for some time. I also tried using my hosting account to setup a test website and password protect the directory to keep people out while testing. While that process is also fairly easy because I did not need to setup the server end, I still could only work while on the Internet (which is hard to do when I was not in an area with Internet access).
My latest find was software developed by a company called ServerPress. The software quickly sets up the web services needed to spool up a WordPress default site on your computer. You can easily edit the files locally without the need for FTP, just as easy as creating any document. Any changes you make are instant so you can refresh your browser and see your changes. There are two versions of the software, Limited and Premium. I currently use the Limited version, which only lets me run three separate WordPress sites locally at any time. The Premium version will allow you to have multiple sites and provides an easy way to migrate your work to a live server, the Limited version is not as straight forward but I will show you how I do this later in this series.
General Steps
Here are the steps to follow along in the series.
- Overview – describe the purpose
- Local development – Set up development server with DesktopServer Limited (free version)
- Identify user – and problem I am attempting to solve for them
- Topic list – Categorize list of needs of users and topics of discussion
- Research similar sites – and analyze how they answer the user’s needs
- Create storyboards – or sitemaps for different posts and pages.
- Sketch on paper various page layouts, first in mobile view and then on up to desktop
- Determine extra functionalities needed and possible plugins that could be utilized
- Create page/post templates
- Test, Test, and Test some more
- Upload to a live site
Download and install the server
When you visit the ServerPress website to download, you are given the opportunity to purchase the premium version or select the limited version. I have chosen to use the limited version for beginner purposes. ServerPress uses a plugin to manage digital downloads (their site was built on WordPress platform as well), so you have to click the “Free – Add to Cart” button to start the process. In order to download their software, you will need to give an email address, your first name and agree to their terms of service. When you click the “Purchase” link, you will be directed to the download page to choose the version you need. The links will also be emailed to you. I suggest downloading the latest version for either Mac or Windows. The prior version is also offered for download if needed. If you are using Linux, I suggest checking out LAMP or a variant of for your Linux distribution. Double-click the downloaded file and follow instructions. If you have any issues during the install, please review the ServerPress Support page. I am unable to provide support for you in this process, however ServerPress has some great tutorials and walkthroughs to assist.
Running the server
DesktopServer must be run as an administrator, as it will need to make some changes to your system in order for you to create the virtual host settings so you can type your development website address in your browser and automatically point correctly to the files you created on your computer. On a Mac a popup will ask for your username and password for your computer, enter the credentials you use to log in to your computer. For a Windows computer, see the ServerPress support page for assistance (sorry, I don’t have a Windows computer to test the process). With the Limited version, only your own computer hosting the files can view the website, but if you upgrade to the premium version you can change the settings so other computers on your network can view the website. Because of the nature of opening up some of these settings on your computer, you will also see a brief warning about security of your computer and having a firewall setup if you are on a public or unprotected network. This page also asks if you want to start the Apache and MySQL services, select “Yes” and click “Next” to continue. Click “Next” when the service setup is done.
Creating a site
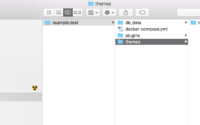
From the main options page, select “Create a new development site” and click “Next”. Either accept the default www.example.dev address or type in any other name you wish. You cannot change the .dev extension so that you do not create any confusion with .com .org .edu etc real websites. The [site-name].dev will be setup on your local computer as the website address for your new WordPress install. Choose the blueprint you wish to use, which should already be selected as a WordPress version that came with the DesktopServer install. If you wish to have other or newer WordPress versions to select from you can download them from WordPress.org and save in the blueprints folder in the zip format. After selecting your blueprint, you can change where the files are stored for your website, but leaving as the default of your Documents folder is suggested, then click “Create”. When the system is done creating the site, click “Next” and then click the link to finish the installation of the site by entering in the website name, details and a username for the WordPress login and your email address. You will be directed to login to your new WordPress site and away you go!!! You now have your very own WordPress install on your computer to play with.
Using the tools
The Limited version does not have many tools to play with, but there is enough to get the job done. There are steps in order to save your WordPress site and move it to a live server. You will need to know how to use an FTP program and login to your Online Host and how to use phpMyAdmin in order to save and upload to the live host as well. If you pay for the premium version of DesktopServer, there is an automated way to export your new site when ready. I will provide a walkthrough a little later to show you how to do this manually using the cPanel of the hosting service I set up for my live domain. Your hosting provider may already have tutorials to copying a website over to a new host. WordPress also has plugins that can assist in migrating your site to a new live host, like Duplicator or BackupBuddy. In the limited version, I do not find the copy or move website feature any use, but i do use the remove website when I want to work on another new site. I have found that it works best for me to have one site setup for me to play around with and possibly develop new themes and plugins and I will create various dummy posts and pages to see how the different themes change. I then use a second of the three available sites for the current project I am on for my client, and then I use the third website as a throw away site that i don’t mind deleting right away for any ad-hoc extreme testing that I want to do. At some point I will need to upgrade to the premium version so I can work on multiple client sites easier, but the limited will suffice for now.
Recap
While there are many available solutions to setup a development server, I prefer to work locally just in case I do not have internet service. Setting up a local development server can be troublesome for many beginners and DesktopServer helps make this far easier a task to accomplish. Using the limited version does have a lack of features and also does not include an easy feature to move your local site into a live hosting account, however there are ways to accomplish the tasks. Setup Desktop Server, create a new website from a WordPress blueprint included and you are off and running with your very own WordPress install. Good luck and enjoy
Next Step > Identify User and Problem you are helping them to solve


I am really thankful to the owner of this website who has shared this impressive piece of writing.
Hey there, You have done a fantastic job. I’ll definitely suggest to my friends. I am confident they’ll be benefited from this website.